The drill adventure begins

Today started with a lot of learning about how much I didn't know.

First, I waited far too long to crack open our window quote, and learned that the proposed window sizes were all different than specified by the architect, to fit into standard sizes. The thing would have looked ridiculous. But we need to know the window sizes to finalize post locations, which affects exactly where we drill giant holes in the foundation.

Second, the rental shop said their hammer drill bits weren't good for rebar. Wut? All my little ones claim to be! Hmm. So we didn't rent.

But all of this stuff is on the critical path!

For the windows, we called all over tarnation and found a lumberyard with a window rep on staff on Saturday. We dropped off our plans with him, and hit the road.

As Eliot drove up to Cle Elum, I spent an hour browsing the Internet to find drill bits that can eat rebar and are long enough to do our ridiculous job. I never quite found the right things, and already had $500 of stuff in my cart.

In Cle Elum, we found drill bits that were supposed to be good for rebar, that were about 3" shorter than we need. We realized that we could drill most of the holes, then do the last 3" (which won't have rebar) with rental equipment later.

And then the window quote came in, with all the windows the right size! So we went from no numbers and no tools, to plenty of work to do.

Siggy brought his bike.

...and looked for frog holes.


When we arrived, this turkey was leading us around slowly.


After we left her alone, she gathered up a dozen chicks and led them away. Cute! The photo is terrible, but some of those blobs are cute little chicks.

Eliot and Calvin got the HVAC pad forms done, and got rebar ready to go in the other forms.


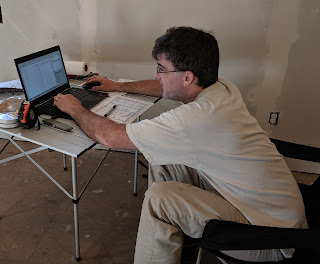
I spent five hours at a desk, carefully measuring out the locations of the 20 holes we need to drill in the foundation. Then measuring, and re-checking those results again. I'm pretty sure they're right.


Eat, drink, and be merry, for tomorrow we drill concrete.

Comments

Post a Comment

Popular posts from this blog

The trim finishing journey begins

The last time we installed wood trim (almost two years ago!), we sanded and cut the material inside the cabin (it was winter) and installed it unfinished. Finishing it meant taping everything off and applying three coats of finish in place. Removing the masking was frustrating (the finish glued it to the wall in places), and in other places the finish still got where it didn't belong. Now the cabin is full of nice, finished floors, cabinets, and counters. It's not a shop. So this time, I'm sanding and pre-finishing all the boards outdoors. Thankfully, there's still pretty nice weather; that black tarp garage heats up pretty well when the sun's out. Today I got the first batch of wood sanded and a coat of finish applied. Christina installed eight receptacles in the kitchen and great room. My mom came up to enjoy the warm ambiance of the not-yet-active wood stove.

Uncrating the wood stove

  I drove up to the cabin today to meet a tree contractor. Since I was up there anyway, I took care of some other business. I got the wood stove out and ready to install on Monday. I vacuumed up the tiny particles of styrofoam packaging material from last year's roofing panels that would have been much easier to clean up last year. I put the bathroom outlet back into its adjusted place above the backsplash. I corrected my installation of the heat pump wiring with a pair of reducing washers. Now it's really done. I replaced the emergency brake battery system in the flatbed trailer.  I bucked a bunch of old logs into rounds for firewood.

Odds and ends

I made progress on a bunch of little things today.  I painted a fencepost in 12" segments and pounded it in at the property line, where the outdoor camera can see it. Now we can measure the snow accumulation. I worked on finishing up almost-complete receptacle branch circuits. The first one I worked on was a little mystery: all the receptacles were installed, but the power didn't reach past a certain point in the line. After some investigation with a wire tracer and watching through the videos we took before covering the walls, I worked out what had happened: two receptacles shared a stud bay, facing into opposite rooms. The plan had been to bring power up to one box, jump over to the other box, and continue back down to the crawlspace to the next box. We forgot the jumper. I couldn't fish a wire between the boxes myself, so that repair waits. Upstairs, installing two receptacles completed the branch. The bathroom vent hole in the tile backer board was a skosh too small. ...